|
| The famous great field work just south of Hochkirch under assault of Loudon's cavalry. |
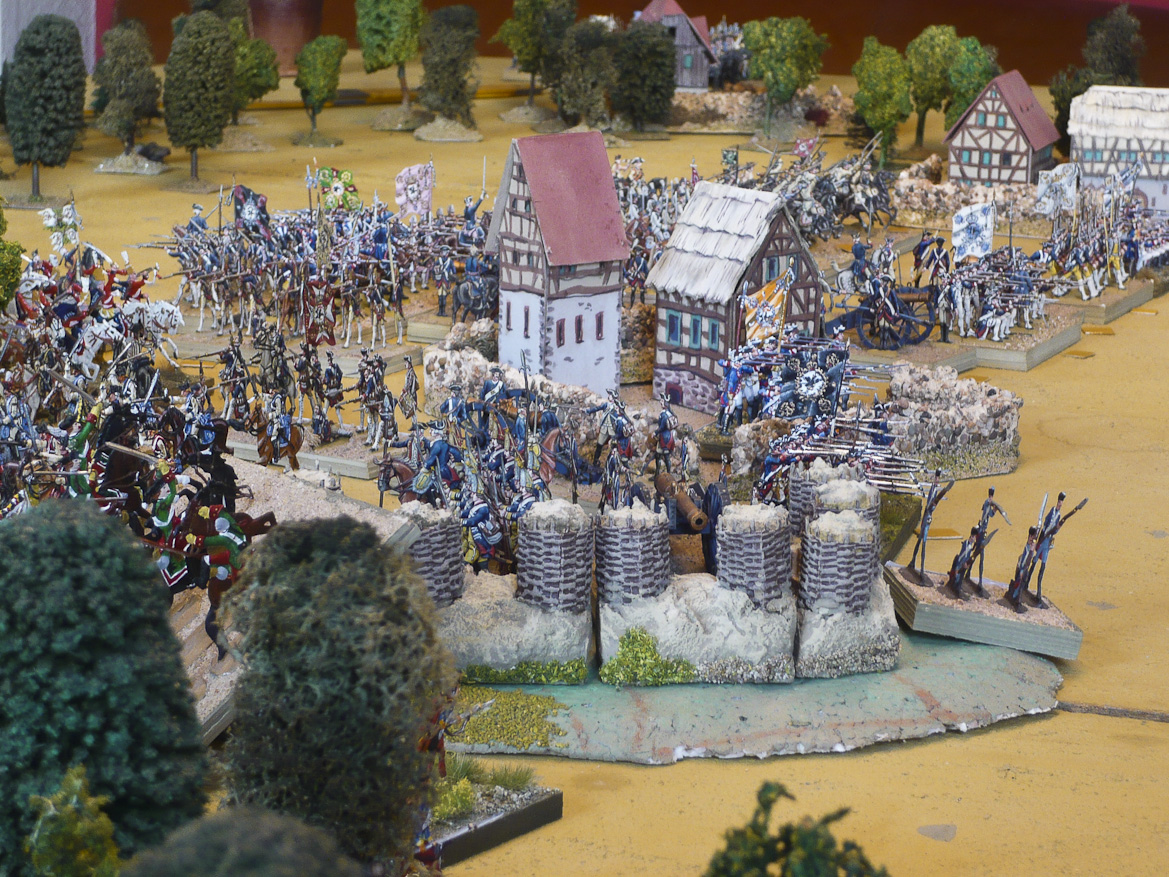 |
| Closer view of the fieldwork with the village of Hochkirch located just behind it. |

Above see a panorama view of the spectacle. The Austrian attack came in pretty much according to the historic dispositions. A massive reenforced left wing of 4 columns directed into the Prussian flank and rear. To represent the Prussians being ‘caught sleeping’, all Prussian units started the game disordered.
Below see my orbat sheets arranged for the two armies with this game. For copyright issues, I did not include the V&B scenario map for Hochkirch. But plenty of maps of the battle should be found in the internet, anyway.
 |
| I must say, I never saw a more formidable Austrian army lined up for the attack. I've inserted my units here, off course. A many are historic & also found at their historic position. |
 |
| The Prussians – so few – but made up entirely of core troops, hence moral 6 for the most and even morale 7 for the Gardes & the Regt. du Corps representing the crack Garde-du-Corps cuirassier brigade. The finest of Prussian troops found here. Up to this day, near all regiments of this army knew of lost battles only from hear-say. |
 |
| Most determined – but poorly drilled amateur – US sundays militia, led by capt. C. Duffy advancing on Hochkirch from a southern direction. The shot was taken during our visit of the battlefield in Oct 2016. We are watching from the south exit of todays Hochkirch town down the "Kirschenallee" or Engl. ‘Cherry Alley’ (see google maps). My position should be approx. on the left flank of the great fieldwork looking due south into the believed advance path of d'Aysne's column. Capt. Duffy wasn't pleased with the conduct of his command. These amateur class lads just couldn't march in step, hence his somewhat indignant countenance. |
 |
| View of Loudon's & Odonnell's troops attacking from south & west directions. |
 |
| Daun and his staff in the left foreground. He is with the column of general d'Aysne. On the right the 2 Hungarian Estherhazy brothers regts. On their left the converged grenadiers of MacBrady & Nugent. |
 |
| MacBrady's grenadiers closing in. The exploding bomb-shells, neatly painted by M*** add to the drama here. |
 |
| The left column of Sincère's command under general Forgàtch attack the fieldwork from the left side. Here its the grenadiers of Cogniazzo and Fiorenza that try hard to take it. |
The fight for the fieldwork became very obstinate. The Prussians refused to leave it to the Austrians bringing in ever more troops for its defence, all the while Ziethen held off Odonell's troops with what was remaining from his division. Ziethen even managed to order one of the Croates battalions to turn about and oppose another battalion of Loudon's Croates.
 |
| Friendly Fire in the heat of the Action! |
Above see the detail of this rare action right near Ziethen's command stand. My co-player L*** really shot at his own troops by rolling dice (a miss). I have never had this before in all the wargames I played in my life.
 |
| The death of Feldt-Maréchal Keith. |
 | |
| The monument of James Francis Edward Keith located in Petershead, Scotland, very near his place of birth. Many thanks to the very alive fellow warrior Scotsman Charles C. Grant who forwarded the image to me. |
 |
| D'Aisne's troops attack on the right of the fieldwork. |
 |
| Loudons fight to crush the Prussian front in the south continues. |
 |
| Ahrenberg's troops or the right wing of the Austrian force engage the cavalry of Wuerttemberg & the Division Forcade deployed in and around the villages of Rodewitz & Wawitz. |
 |
| Buccow's cavalry of the right in concert with infantry from d'Arberg's Division crush Wuerttembers Reserve Corps. It turned the odds in favour of the Austrians in this part of the world. |
 |
| Now the Austrian right wing closes in on Forcade's crack troops. |
 |
| Elements of Colloredo's Centre Corps seize the defile of Niethen. One of the two Prussian Free-Battalions has just been evicted from the cross point over this otherwise marshy banked stream, impassable for artillery. |
 |
| At around noon, the Grand Fielwork was eventually abandoned by the Prussians. Loudon's command stand seen on the right is pleased to see it in Austrian hands now. |
 |
| The final stage. The Prussian Gardes under attack. |
 |
| A bit out of focus, but it remains the key scene of Prussian total defeat. The Gardes are swept off the field by deadly ‘canister brooms’ delivered at point blank range. |
 |
| Finale. Daun accepts Frederick's surrender. |
Summery:
A great game it was. The Austrians really needed every single unit of its army. The Prussians fought like lions. If the Prussians hadn't lost 4 units routed in the first turn, who knows, the outcome may well have been more favorable for the Prussians. Losses on both sides were high. As far as I can recollect the figures from our orbat sheets, Austrian losses were 14,000 men & 20 guns, while the Prussians lost 13,000 men & 75 guns not including prisoners.